
You may be a big fan of Inspector Gadget, don’t you? Like any other fan, you may often want to make a costume like Inspector Gadget. People can somehow manage or make the outfit. But, when it comes to making the headpiece, they are in trouble.
If you are from that group of fans, you have come to the right place. Why? Because we will show you a step-by-step guide on making the Inspector gadget costume in the easiest ways.
Let’s dive in.
Things you need for Inspector Gadget Costume
- Narrow PVC pipes.
- Black or gray hat
- Detective kit.
- Hand Gloves.
- Knife/Scissor.
- Steelstik.
- Tissue.
- Wallet.
- Pipe Cutter.
- Printable identification card.
- Magnifying glass.
- Steel wires.
- Pillow.
Read More: 10 Best Baking Gadgets That Make Your Life Super Easier
Step 1: Cut the Pipes
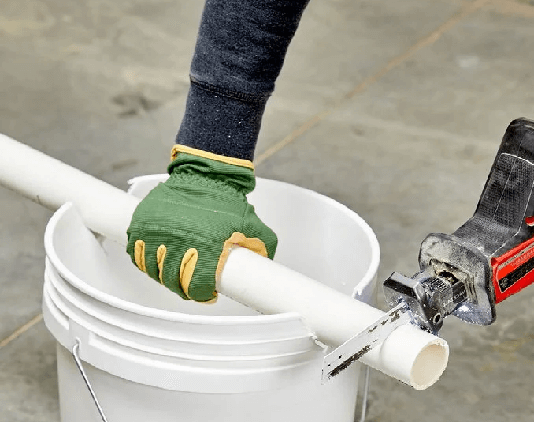
Once you have some narrow PVC pipes in your collection, it’s time to cut them. You need to use the pipes to make the hands of the headpiece, sounds weird? Make sure you cut the pipes according to the correct size.
You can use the pipe cutter to cut the pipe, or a sharp knife can also do the task. Ensure you make four pieces of the pipes.
Step 2: Make Holes Besides the Hat
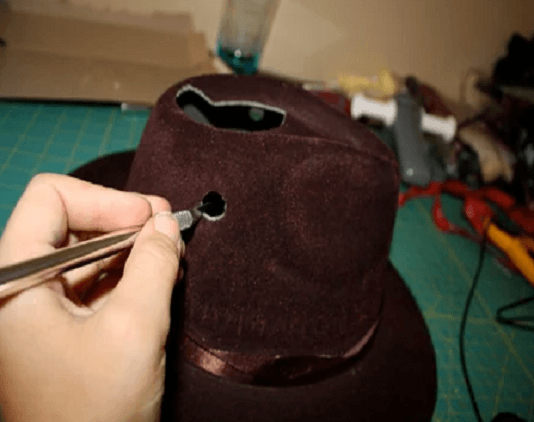
Suppose you are cutting the pipe. It’s time to make holes beside the hat. To make holes, you can use scissors or a knife. Moreover, don’t make more than two holes. Besides, make sure the holes are of the same size.
Step 3: Put the Pipes Onto Holes
Now, it’s time to insert the pipes onto the holes beside the hat. You need to perform the task carefully and don’t put the pipes so deep into the hat. Make sure there is enough space in the hat so that you can wear the hat quickly.
Step 4: Insert the Steeklstik in the inside part of the pipes
To fill the pipe’s opening inside the pipe, you need to use a steel stick. If you can’t find the steel stick, paper or rubber can do the task. Put tissue paper on the steel stick for better performance.
Step 5: Join the Pipes
Here, you need to join the pipe. For this, you also need to use a steel stick on the outer part of the pipes. Using the steel stick will make the pipes connected for a long time. Make you apply enough steel stick to get a better result.
Step 6: Put the Printable Identification Card on the Wallet
This is the most exciting task so far. You need to place the printable identification card inside the wallet. Make sure you unfold the wallet, and the two parts are equally visible. Add an inspector batch on one side of the wallet.
Step 7: Shape the Steel Wires and Put Them Onto the Gloves
Now, you need an extended length of steel wires and put them inside the glove. The steel wires will work like fingers inside the gloves. Measure the finger size of the gloves correctly. Then, add some pillow to give the finger shape perfection.
Step 8: Insert the Gloves into the pipes
You need to connect the pipes with the hands you have just made for the inspector gadgets costume. For this, you need to make a ring of the steel wires just on the wrist of the gloves. Insert a portion of steel wires on the outer side of the pipes as well.
Once you do so, use the steel stick to connect the wires correctly.
Step 9: Grip the Identification Card and Magnifying Glass on the Gloves
Last step: here, you should place the Identification Card (wallet) in one hand and Magnifying glass in the other hand of the headpiece.
That’s it. You are all done making the inspector gadgets costume on your own.